
Sailor,
this is part 4 of my provisioning package series:
- Part 1: Windows 10 – Provisioning Packages – Overview
- Part 2: Windows 10 – Provisioning Packages – Installation Imaging and Creation Designer
- Part 3: Windows 10 – Provisioning Packages – Frequently Asked Questions
- Part 4: Windows 10 – Provisioning Packages – Install a single Application
- Part 5: Windows 10 – Provisioning Packages – Install multiple Applications
- Part 6: Windows 10 – Provisioning Packages – Install and Remove Applications and Apps by PowerShell
If you want to install an application via provisioning package you can choose the simple way by just adding the application or app via the provisioning commands:
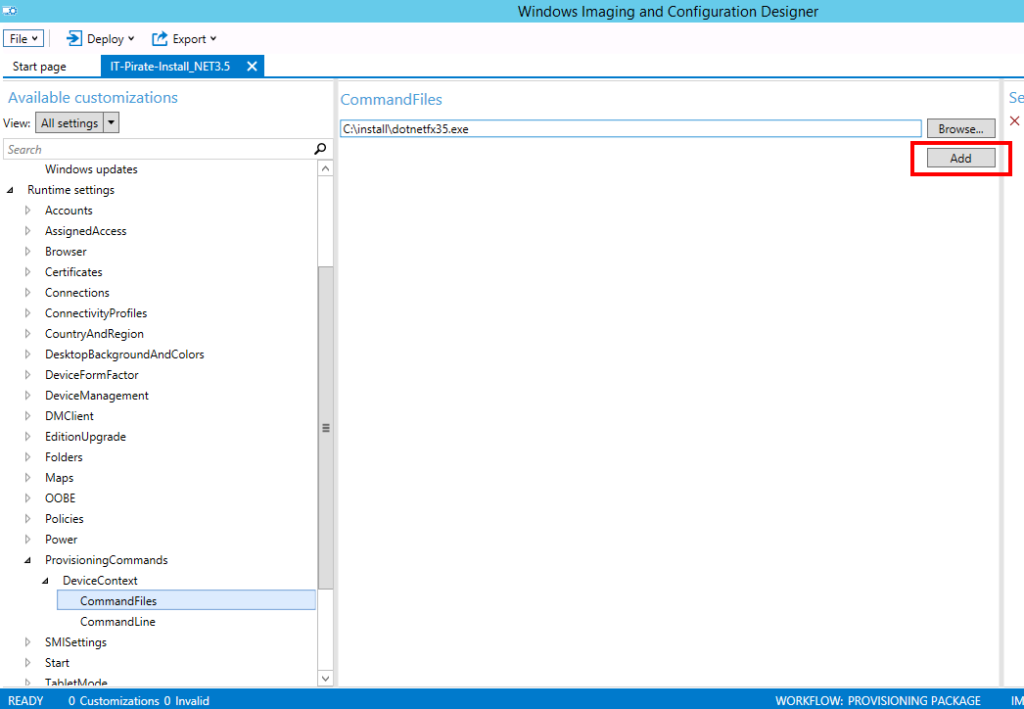
Just create a new Project > Provisioning Package > Common to all Windows desktop editions
Then click on ProvisioningCommands>CommandFiles
here you need to navigate to the *.exe or msi you want to install
and then hit on “Add”
Then you click on “CommandLine” and insert the [FileName].exe with the corresponding installation switches:
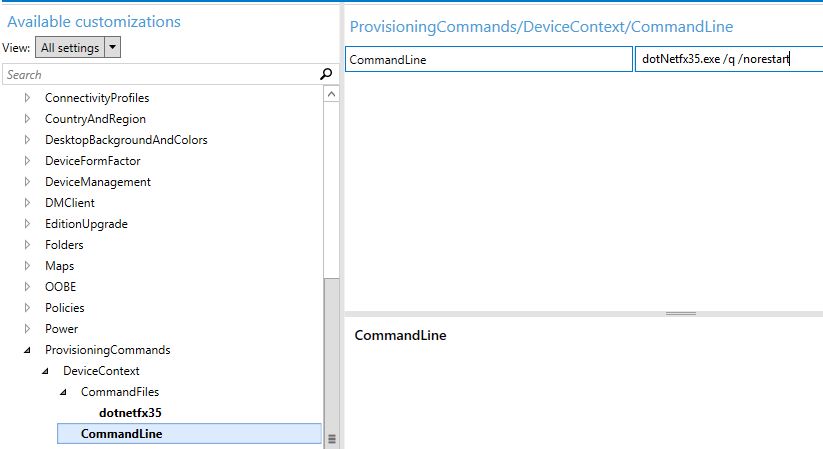
If you export the project as provisioning package afterwards and launch it in the context of an administrator on the client, it will install the application as expected.
Although you can add more than one “command file” there’s no way to add a second “command” line which would allow you the installation of a second application or a script. As this is not sufficient in most of the cases I recently needed to figure out a way how I can install multiple applications.
Cheers
*Cpt
Saikumar Ch
Nice Article with perfect explanation.