
In what follows we proceed to talk about the co-working between Microsoft Entra (Azure AD; PIM) and Microsoft Purview. The aim is to present the possibilities of leveraging PAM to deploy labels, policies and similar to mail-enabled groups (M365 Group for this post).
Please do not see this as a limitation, rather, the possibility to use this tech in scenarios that require a mail-enabled group to be assigned for example, when assigning super users, creating test DLP policies, etc., or in this case deploying labels like a hero! TBH the possibilities are endless.
What is Microsoft Entra?
Recently reorganized enters Microsoft Entra (refer launch post under link), now defined as the product family encompassing all of MSs’ identity and access capabilities. This family now comprises the following three products (two of which are new):
- Microsoft Azure Active Directory (Azure AD)
- Cloud Infrastructure Entitlement Management (CIEM)
- Decentralized Identity
The products in the Entra family will help provide secure access to everything for everyone, by providing identity and access management, cloud infrastructure entitlement management, and identity verification.
Microsoft Entra will verify all types of identities and secure, manage, and govern their access to any resource. The new Microsoft Entra product family will:
- Protect access to any app or resource for any user.
- Secure and verify every identity across hybrid and multi-cloud environments.
- Discover and govern permissions in multi-cloud environments.
- Simplify the user experience with real-time intelligent access decisions.
The specific part of Entra we will use for this solution is Azure AD, finer granularly PIM (Privileged Identity Management). To be clear, one of the pivotal parts of this solution utilizes a feature called “Privileged Access Groups” which is still in preview at the time of writing this post.
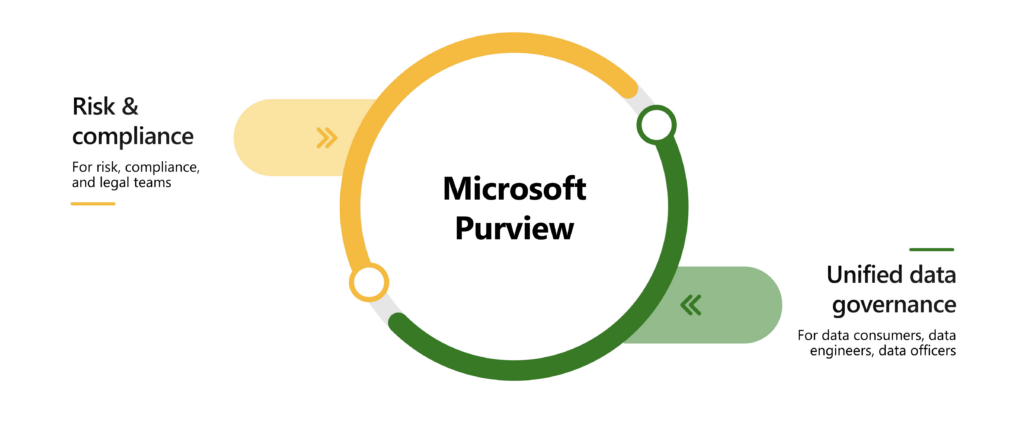
Microsoft Purview: Deploying Labels?
Microsoft Purview was designed to meet the ever-present current challenges of a decentralized, data-rich workplace. That entails, MS Purview, is a comprehensive solution to help you govern, protect and manage your data real estate.
The new Microsoft Purview:
- Helps you gain visibility into assets across your entire data estate.
- Enables easy access to all your data, security, and risk solutions.
- Helps safeguard and manage sensitive data across clouds, apps, and endpoints.
- Manages end-to-end data risks and regulatory compliance.
- Empowers your organization to govern, protect, and manage data in new, comprehensive ways.
Overview of Implementation
To provide a brief overview of the implementation, as an outcome you can expect the following:
- First and foremost, the users that request to be part of the group (to which the labels are deployed; through the self-service PIM function) will have for the period that they have requested access, access to all deployed labels.
- Next, The users have the freedom to try before committing to supporting a complete rollout.
- No change to the workflow (save the appearance of a sensitivity button in the M365 apps) *Please note I do not suggest this for more complex implementations of Purview. i.e. DKE, BYOK, etc.
Pre-requisites to a Successful Implementation
To successfully implement this you will need the following:
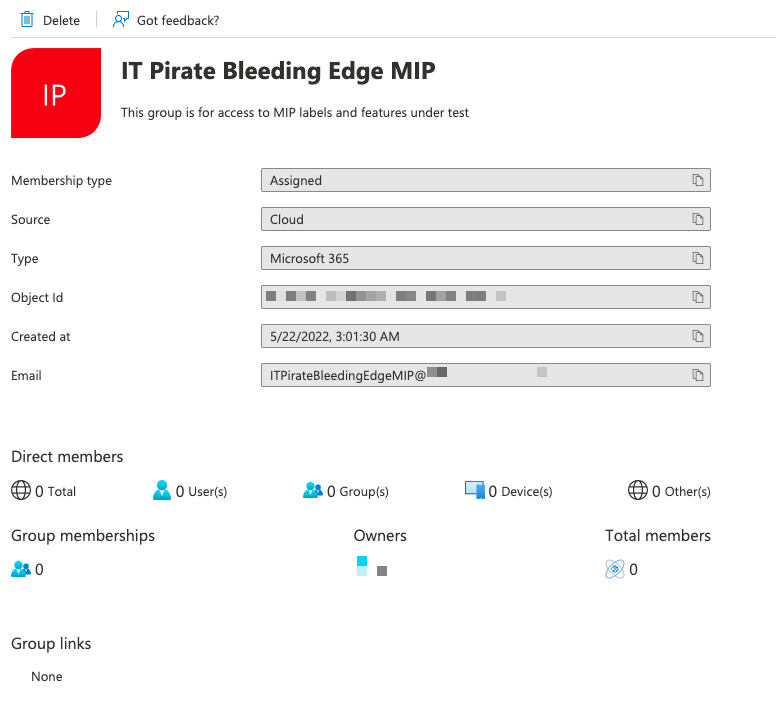
- An Azure AD M365 / Mail Enabled group to which we can deploy the labels. Please refer image below for the example used in the following how-to:
- A valid tenant with a valid subscription and PIM / PAM enabled.
- The preview for Privileged Access Groups is activated. To do this the following must be done:
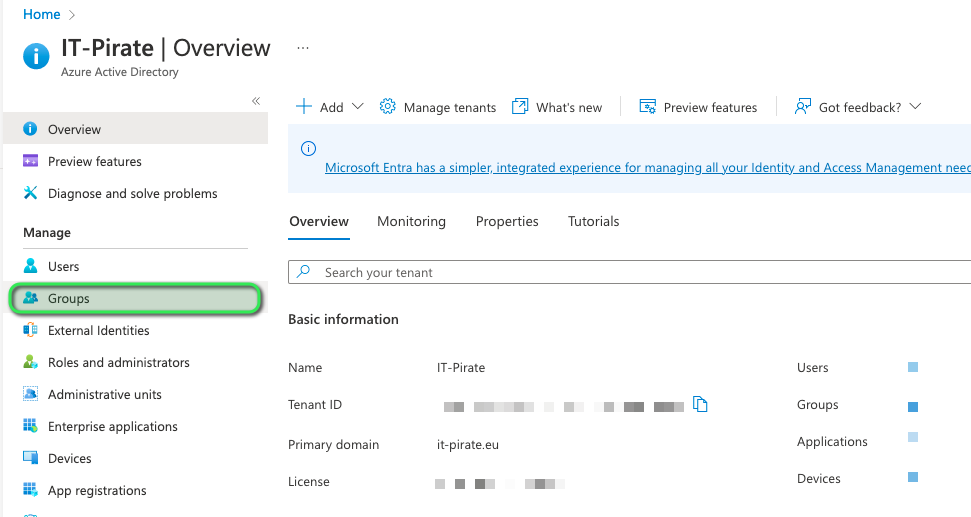
- Navigate to the Azure portal.
- In the search bar type Azure AD or navigate to Azure AD.
- Next, we must navigate to groups then further in the left sub menu navigate to Activity and specifically click on the button to enable privileged access, refer images below:
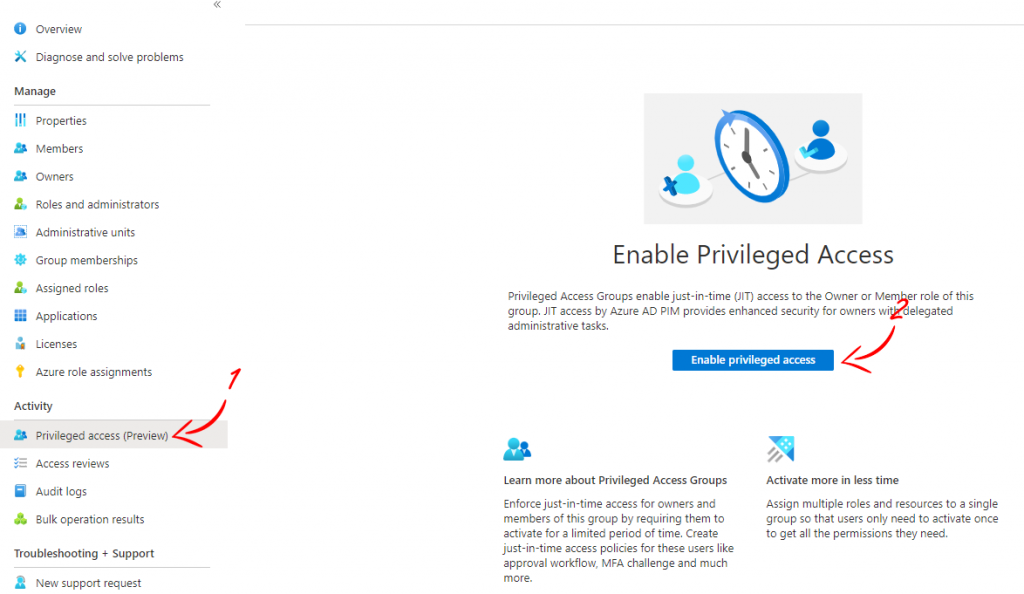
- Lastly, and most importantly on the topic of permissions, A user with Global Administrator, Privileged Role Administrator, or the group Owner role.
How-To Set this Up!
This section specifically will be the how-to steps on implementing this rollout technique. This how-to will consist of the following three parts:
- How-to: Azure AD Group
- How-to: Setup the Eligible Group Assignments
- How-to: Request membership in the group
How-to: Azure AD Group
In this section, we will quickly talk about how to set up the group to be used. Here there needs to be only one action outside the norm (as highlighted in the image below; green) i.e. Azure AD Roles need to be allowed to be assigned.
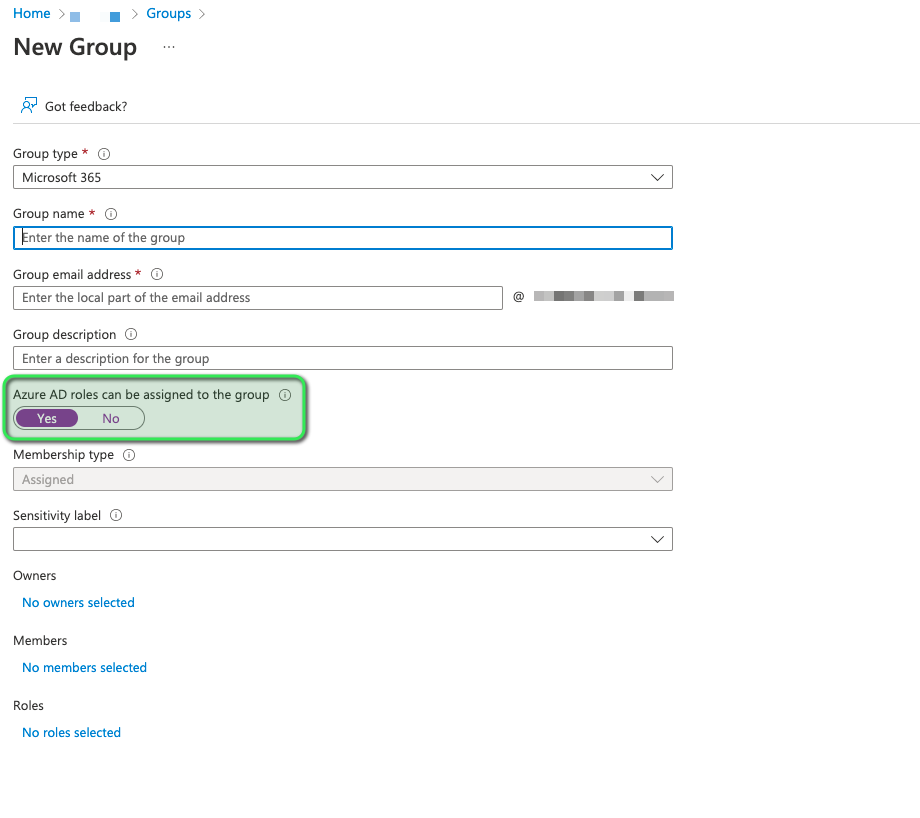
As a small suggestion from my side, I would highly recommend at least for the testing phase, having two dedicated owners for the said group. At this time no membership assignments are needed.
How-to: Setup the Eligible Group Assignments
Here we must first go to the Azure portal under portal.azure.com.
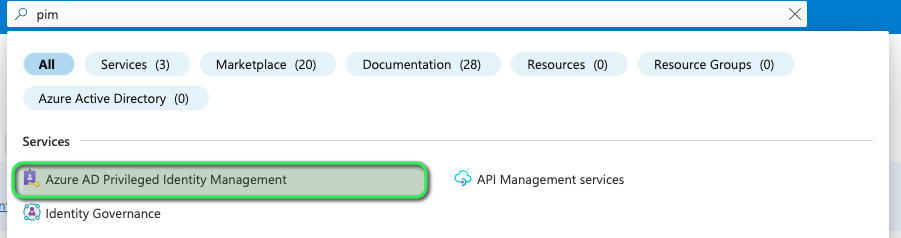
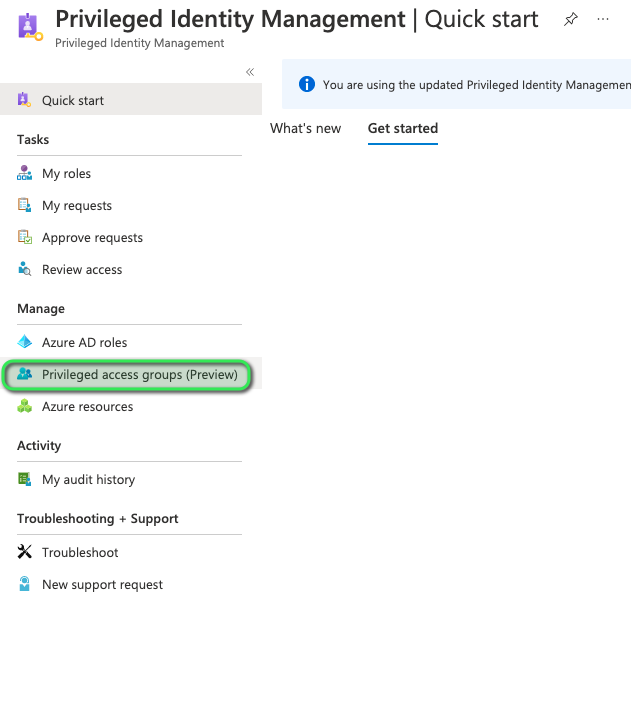
Once there, in the search bar (top centre screen) enter the search term “PIM” then under Manage click on Privileged Access groups (refer to the image below).
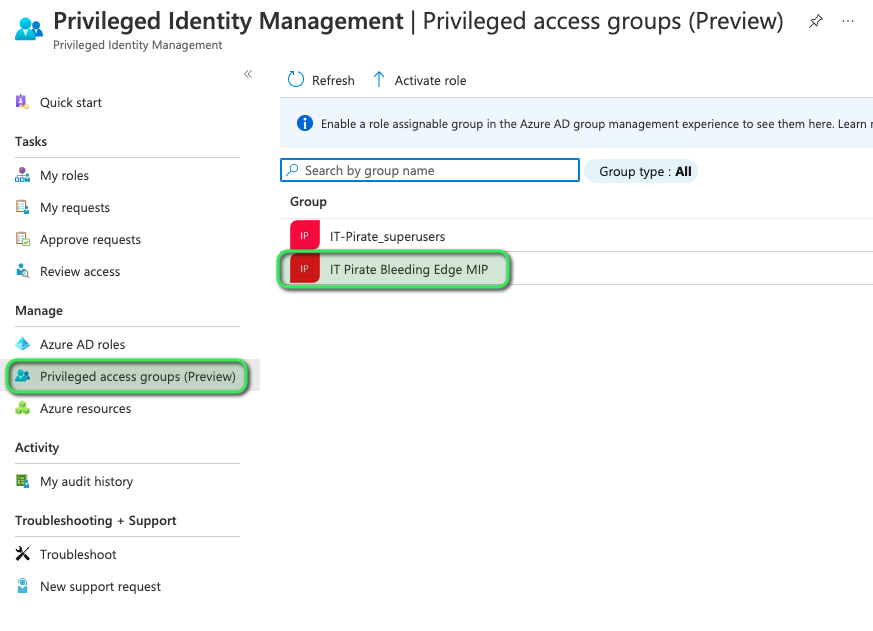
This pane should now show you the said groups onboarded to Privileged Access. Here should state the name of the group you just created, as shown in the following image:
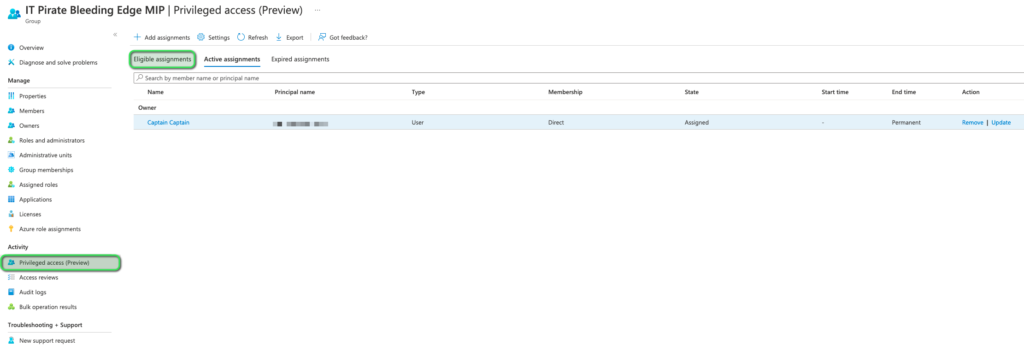
Now that we have spotted our group on the list. we can move on to adding the eligible assignments, for this we need to navigate to the said group within Azure AD. Following this in the left-hand menu you need to select Privileged Access, then select Eligible Assignments. Please refer image below:
Under this menu we are now able to select Add Assignments, refer image below:
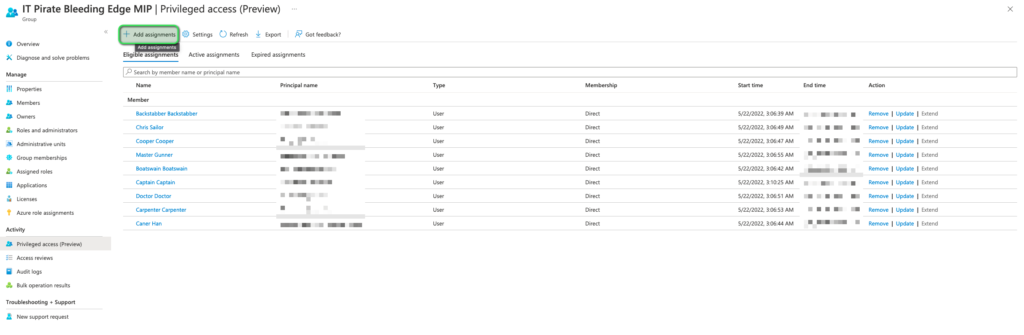
You would also be able to see (refer to the image above) a list of eligible users for assignment to this group with their respective roles. For this post, we shall, in the next section, request access as “Master Gunner”.
Upon clicking the button to add assignments we must make a critical decision i.e. to which role to assign the eligible user, please refer image below:
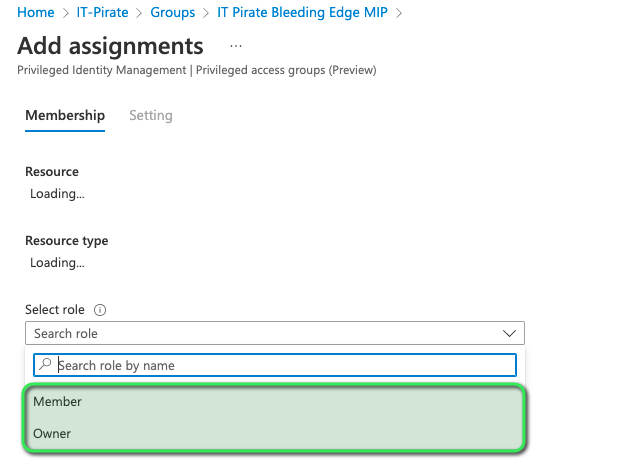
There exist two possible options when it comes to the roles:
- Owner: As is apparent will behave “temporarily”; up to a maximum of 8 hours, as a group owner.
- Member: Again this will behave albeit “temporarily” as a member of the group, therefore, having access to all resources, deployed products, etc. assigned to this group.
Now we can proceed with selecting the members and then we can go ahead and add the eligible assignment.
How-to: Request membership in the group
In this section as mentioned above a brief overview of the workflow to request access to the privileged group. To do this you first need to navigate to the Azure portal, then in the search bar type “PIM” and select Privileged Identity management.
In PIM we must now select, My Roles, please refer to the image below:
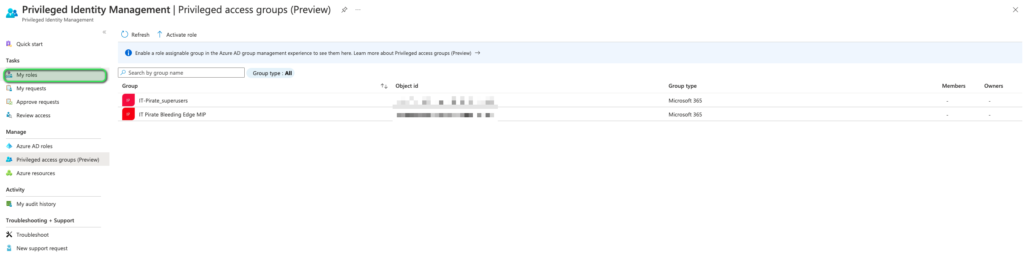
Further within the My Roles window, we need to select Privileged Access Groups (preview), refer to the image below:

Under Eligible assignments, you should now be able to spot the group which you created as well as, if configured correctly, the eligibility to activate membership to the said group. At which point the user would need to click the Activate button corresponding to the group. Please refer to the image below:

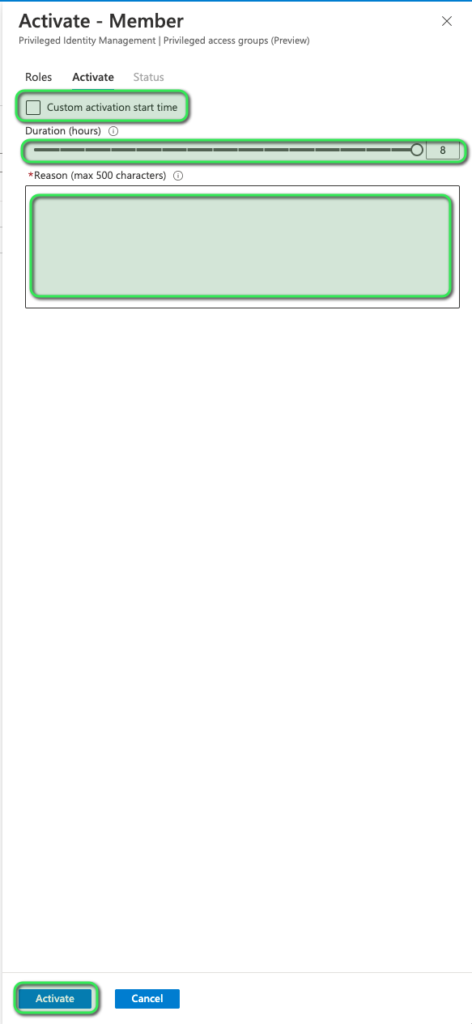
Upon clicking activate, we are now greeted with the membership activation window, where the following needs to be considered:
- Do we need to set a custom activation to start time i.e. in situations where preparation is being done and need to configure this membership in advance.
- The duration for which this membership shall be assigned is up to a maximum of 8 hours.
- The Reason behind the activation i.e. Testing labels in this case.
These things considered we can now move on to activating this assignment by clicking the Activate button. Please refer to the image below:
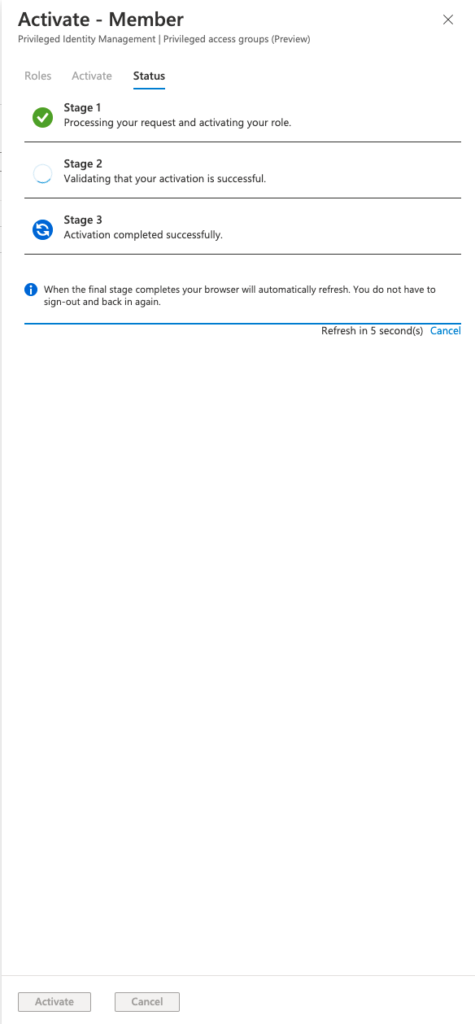
Once activate is clicked you will be presented with the following screen, and as displayed (refer to the image below) post the successful completion of all three stages we have now successfully assigned the user/users in question to the said group. Hence, post the Azure minute the users shall now have access to the deployed labels to this group.
Future work
To make this implementation technique, something for lack of a better term special. Further testing is needed to check compatibility with, as mentioned before, the more complex implementations of Purview. Furthermore, a thorough investigation is needed into the specific pro and contras of this deployment/dare I say, rollout technique.
Some possible use-cases:
- Used as part of a phased roll-out approach. To maximize customer buy-in with the “try before you buy” methodology.
- Used to allow access to a super user group.
- Used to allow temporary access to external partners to deployed label sets.
Please feel free to look for suitable opportunities under:
Submit a comment on “Microsoft Purview: Deploy Labels like a Hero (feat. Microsoft Entra)”