

In the previous article on Endpoint DLP, I presented the basic functionality of Endpoint DLP with real life examples.
In this blog post, I will now go into more depth of the different features.
I present the individual protection options with examples and screenshots.
Use case:
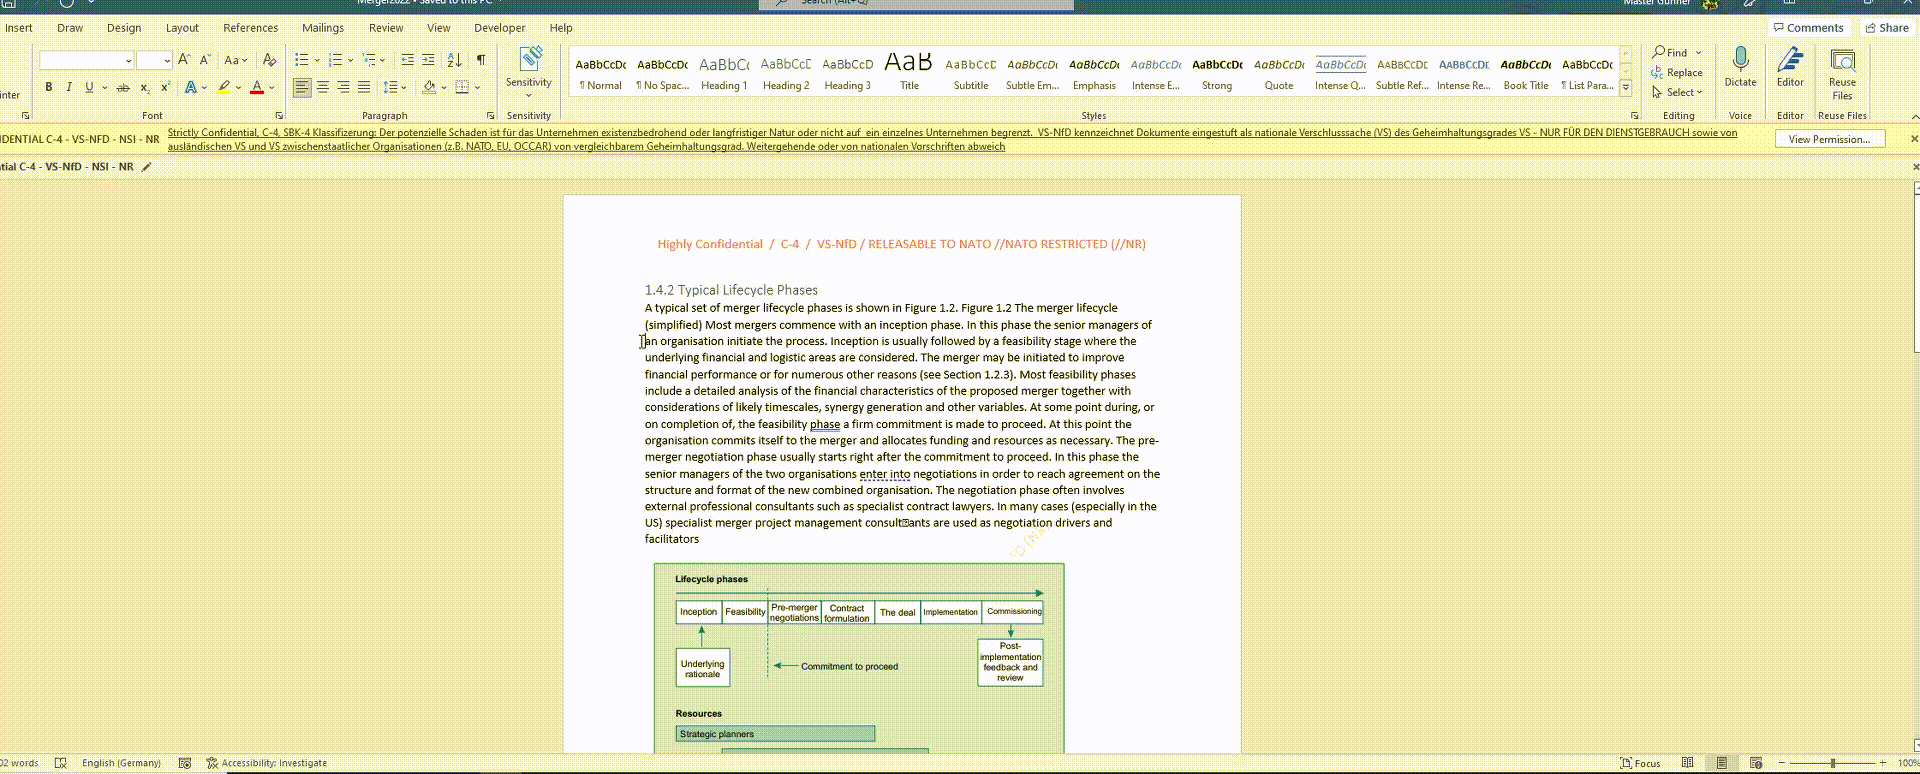
A member of the supervisory board, Dr. Ludwig K., works with sensitive data of level C-4.
C-4 is the most sensitive data and any leakage can severely harm the enterprise.The naming could be different in other companies or enterprises, but the bottom line is, everything boils down to “strictly confidential”.

An acquisition is pending, and a competitor is to be taken over.
The member is required to label all relevant documents and files with the sensitivity label C4 – strictly confidential.
Use and ways to protect computers from the board of directors
We now accompany Dr. Ludwig on his daily way of working.
In the course of the “Digitalization 2020” project, his company started early to rely on Office 365 as a solution.
The project is scheduled to run for several years and there is still a classic on-premises infrastructure with physical servers. So we have a hybrid AD solution.
Ludwig first checks his email inbox in Outlook and then devotes himself to various calculations for the planned transfer – to Excel.
_

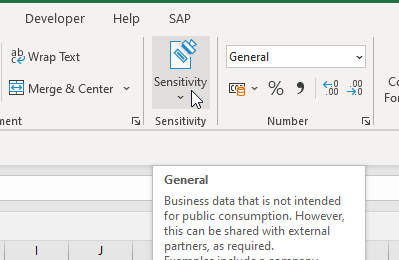
He has labeled the file as “Strictly Confidential” with a sensitivity label in accordance with internal data classification guidelines.
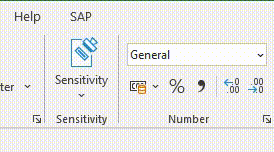
As a person who is not very tech-savvy, this is simplified for him by the Microsoft Information Protection Button in Excel.
One click and the file is labeled, header, footer and watermarked and protected.
After an hour of analysis and evaluation, he saves the file to his laptop. Instead of his file folder “Excel” he clicks and saves in the local OneDrive synchronized with the cloud….
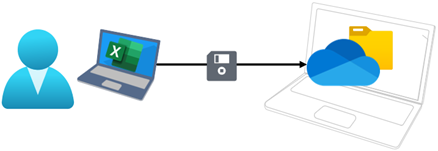
…and thus, almost violated the data classification guideline. Data of the highest protection class 4 must not enter the cloud.
Fortunately for him, during the “Digitization 2020” project, thought was given to information protection in the cloud and Microsoft Information Protection was implemented.
One part of this is Endpoint DLP. And it is precisely this part that now prevents the synchronization of the file from the OneDrive folder in OneDrive Online.
The blocking of applications
In my last blog post – in case you missed it, you can find it here – I described how Endpoint DLP is a combination of global settings and a DLP policy.
One part of the global settings is called “Restricted Apps and Groups” .

Let’s have a look into the Info Panel in gray.
If a policy blocks restricted apps from accessing files, cloud apps like OneDrive might show repeated notifications to users as the app continuously attempts to access the files.
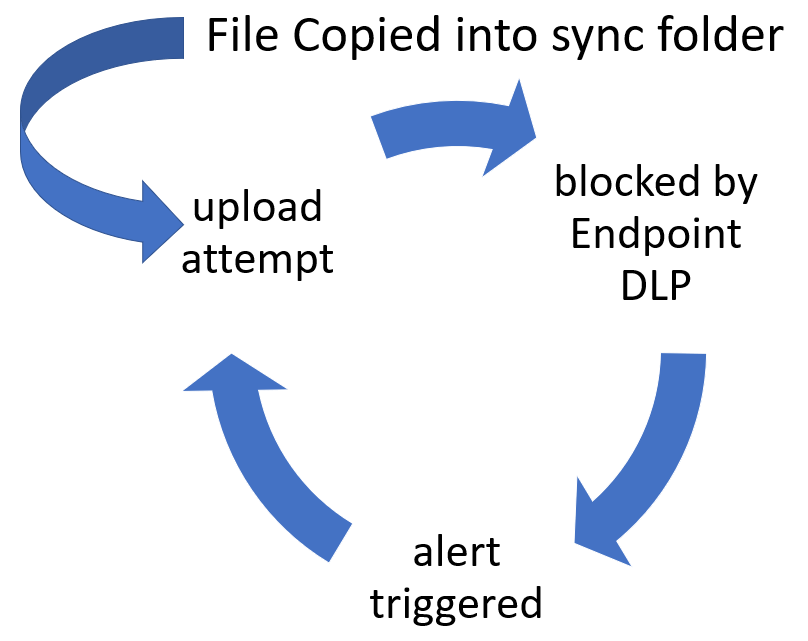
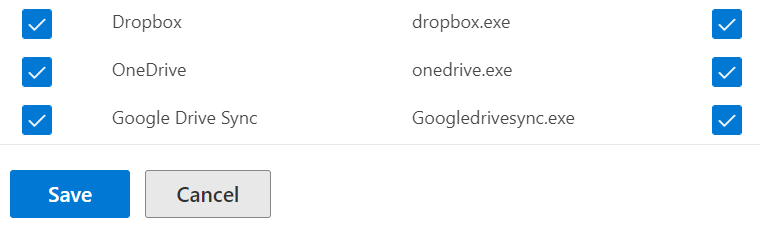
This means, that some cloud apps like OneDrive, or Dropbox, or Google Drive use a synchronized folder on the endpoint.
When you now copy, create or save a file which is under the scope of the DLP settings into this folder, the application starts to do its’ job –
1. and this is to upload and synchronize the data into the respective cloud.
2. Which is blocked by the Endpoint DLP settings.
3. Which triggers an alert.
And this is a continuous cycle, you can begin at number 1 again.
This, of course, gives an unwanted amount of alerts. Disturbing both for the user as same as the administrators or SOC team or whoever works on incidents and alerts.
To prevent this, we specify a location on user’s devices to quarantine files, then select the ‘Autoquarantine’ option when adding apps.
To circumvent this, you can add a quarantine folder on the Endusers machine in which the file will be moved.
How can you achieve this?
First, you have to open the global settings in the Microsoft Purview portal.
To go there, choose Data Loss Prevention and then Endpoint DLP Settings.
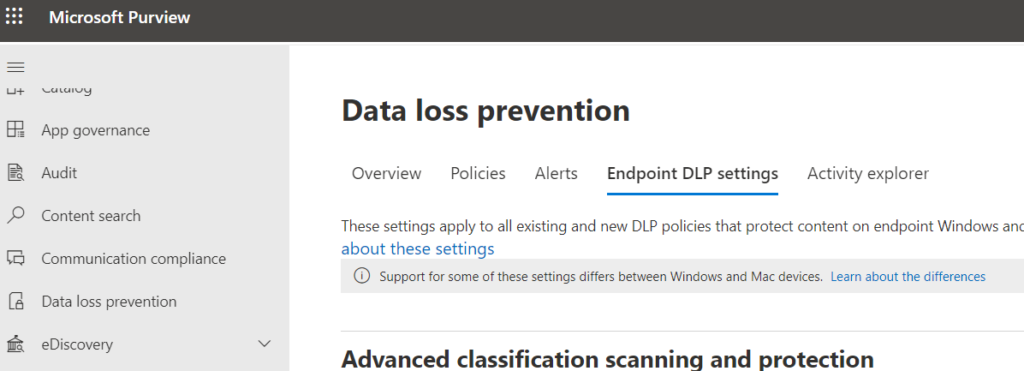
after clicking on the tab, scroll down to this section:
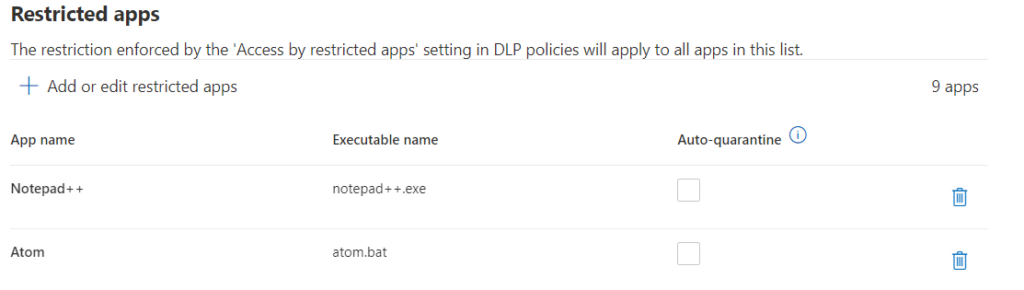

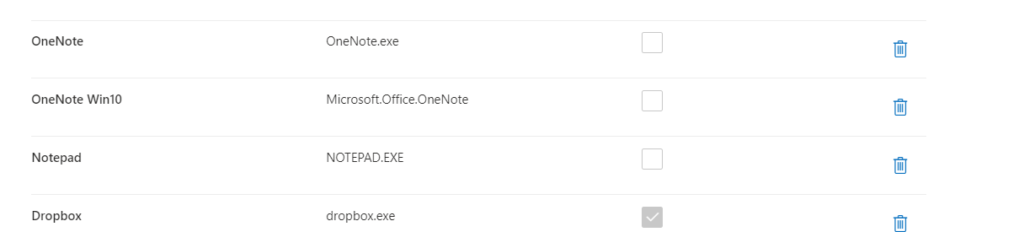
They are grayed out. Now. How do you add auto-quarantine settings? Click on “+ Add or edit restricted apps”. A new window opens on the right side of your browser:
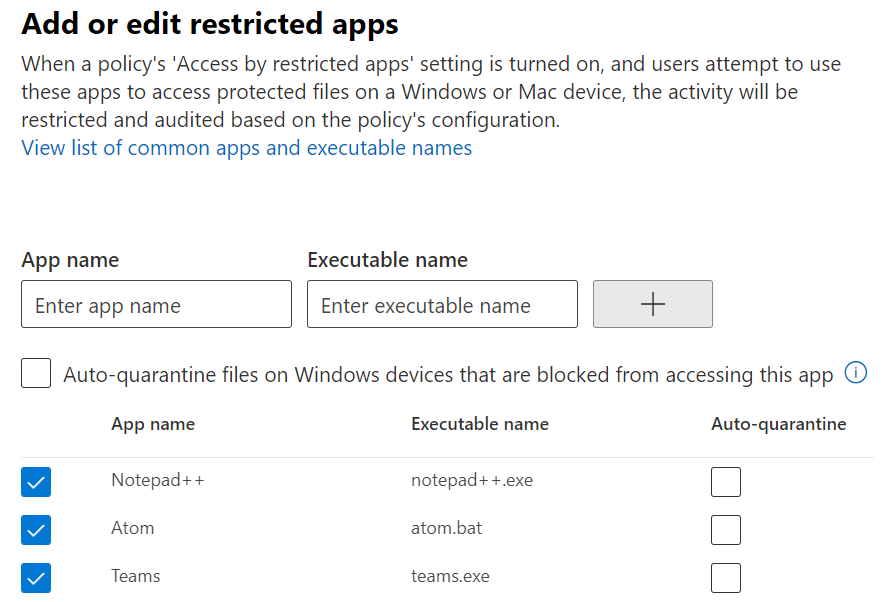
These first three apps don’t use synchronization folders. Besides Teams, but this is not relevant right now.
The actual Auto-quarantine settings must be set right below the list of applications.

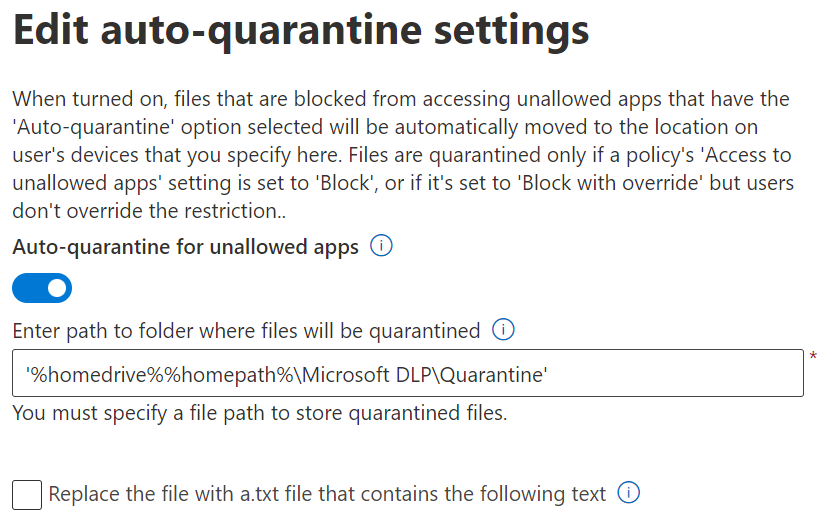
C:\Users\FirstName_LastName\Microsoft DLP\Quarantine\OneDrive as an example.
DLP Auto-quarantine will create sub-folders for the files for each unallowed app.
So if you have both Dropbox and OneDrive in your unallowed apps list then a sub-folder will be created for Quarantine\OneDrive and another sub-folder for Quarantine\Dropbox.
To help the user – which might be confused – to find the file in the quarantine folder, you can choose to configure the settings:
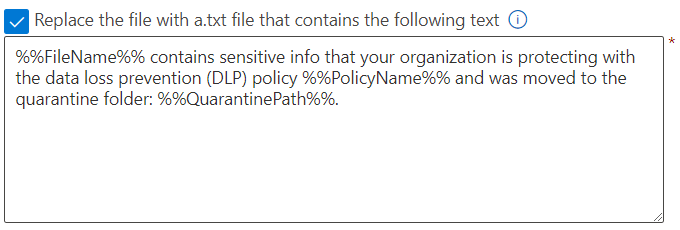
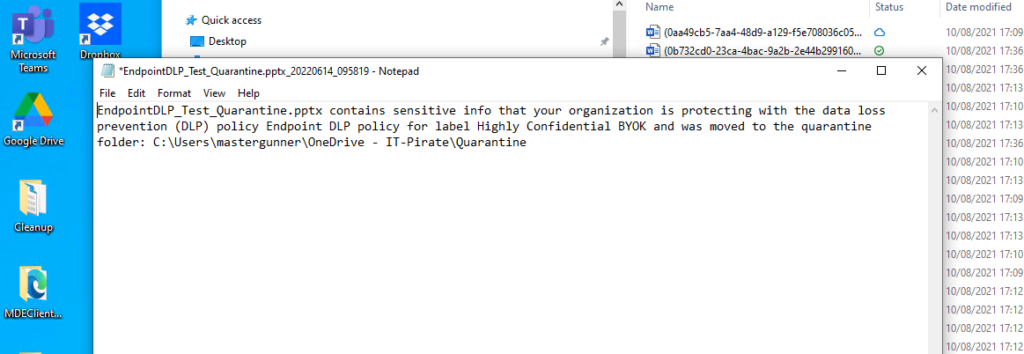
The moved file will now be replaced by a .txt file. When you open the .txt file, it will show this text:
This was an example how applications can be blocked uploading sensitive content.
Dr. K is also regularly and actively working with Microsoft OneNote.
He chose to copy some content of a merger related document into the Quick Notes section as a reminder.
We have previously added OneNote to the restricted apps. Therefore, any activity in between files labeled with our sensitivity label and OneNote is controlled.
As expected, the copy and paste operation from the merger document into OneNote fails and our already known toast message pops-up.
The above animated image shows the behavior with the regular “classic” OneNote app.
It does not matter whether you restrict the OneNote “classic” app (*.exe) or the OneNote for Windows 10 app from the Microsoft Store.
To show the that this is true, please have a look at the next part:
In the following animated Image, you see how Dr. K first copies the content of an invitation into his OneNote for Windows 10 app without any problems.
You can distinguish between both OneNote apps by their design.
After that, he copies parts from the merger document and tries to paste it below the invitation text on the same OneNote page.
Without success.
Please note, that there is only one difference – or bug – at the moment, which shows an additional block message directly in the OneNote Microsoft Store App additionally to the standard toast message which appears with slight delay.
Remote Desktop Protocol (RDP)
I have shown you how to protect a sensitive file from spillage via applications, now we are having a look into blocking the Remote Desktop Protocol.
RDP is used to connect to machines somewhere else. Those might be virtual or physical machines.
You are generally able to copy files or clipboard content from your local machine you are sitting in front of to the remoted machine.
And the other way around.
To prevent sensitive data being lost via this way, Endpoint Data Loss Prevention also protects from spillage via RDP.
In this animated image, I try to copy the sensitive merger document from the virtual machine on our dev server to my local machine.
I can’t
There is no DLP pop-up or warning on my side, which totally makes sense since my machine is not onboarded into the dev tenant and therefore not under the control of Endpoint DLP.
However. The virtual machine from Dr. K is and therefore the file can’t be copied or moved from the endpoint via RDP to my local machine. The warning message appears on the connected endpoint itself.
The blocking works as expected.
Activities in Purview
The endpoint is onboarded in in Microsoft Defender. Therefore, the file activities are monitored.
To check those activities, you have again log-in into the Purview portal and click on “Data Loss Prevention” and then on the tab “Activity Explorer”
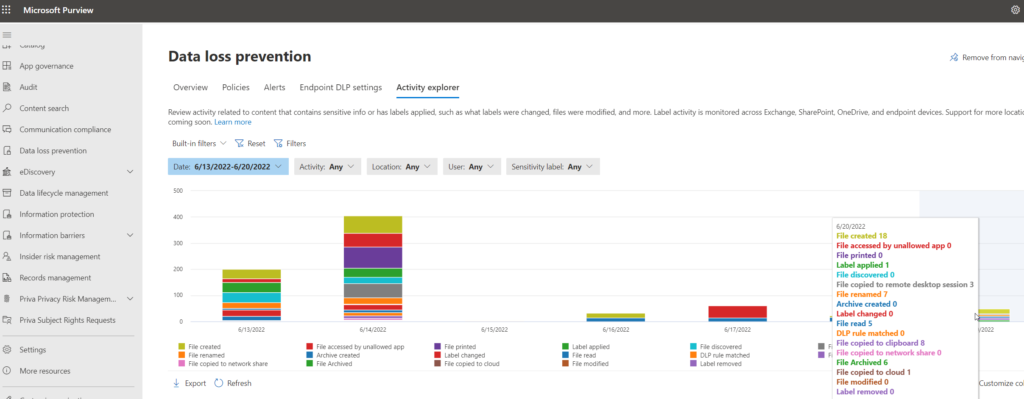
The Activity explorer presents a big amount of data for the file activities.
Our attempts to move sensitive files or data from Word or Excel to restricted apps or via RDP is recorded here.
If you wish, you can also configure an alert to get better visibility into these kind of operations and help the Users to not violate compliance regulations.
That’s it for now. I hope you enjoyed the second part of the insights into Endpoint Data Loss prevention and learned something new. Part three will follow.
See you the next time.
Submit a comment on “Microsoft Purview: Endpoint DLP Part 2”